MENU - INDEX - HOME
Principles
General
![]() Teaching in a group
Teaching in a group
I. Holding Positions
1. Sitting position
2. Ancient Guitar Position
3. Left Hand
a) Placing the hand
b) Mark
and Press
4. Right Hand
5. The plectrum
II. Playing
General
1.Contents of playing
a) Open string
b) Open string
and 1
c) Open string
+ 1 + 2
2. Music Creativity
General
a) Composing
b)
Improvisation
c) Solo
playing
III. Music pieces
IV. Two strings
General
The pieces
The New Music Educational Project - My Ancient Guitar
 |
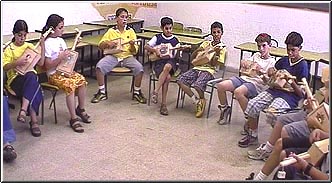
During the building stage we have recommended arranging
the sitting in a "U" shape so as to enable the teacher to reach every
student. During the playing stage it is recommended to keep this sitting arrangement, however, without the tables. Every lesson we will gather all the instruments to one table and hand them out only after an orderly opening of the lesson. |
Each lesson will be divided into three units:
I. The Opening:
![]() 1. An outline of what we will do during the
lesson (about 30 seconds).
1. An outline of what we will do during the
lesson (about 30 seconds).
![]() 2. Adding a concept/subject/idea/new
experience - that is, learning (about 7 minutes).
2. Adding a concept/subject/idea/new
experience - that is, learning (about 7 minutes).
II. The body of the lesson:
Learning the central subject of the lesson (for example, learning how to play with the
first finger). This stage will include:
![]() 3. Learning to play - the whole class will
learn as a group (for example, the position of the first finger).
3. Learning to play - the whole class will
learn as a group (for example, the position of the first finger).
![]() 4. Teaching the learning contents (for
example, teaching the position of the left hand - see the detailed learning chart at the
bottom of this frame).
4. Teaching the learning contents (for
example, teaching the position of the left hand - see the detailed learning chart at the
bottom of this frame).
